Say Goodbye to Slime Stains: Quick and Easy Carpet Cleaning Hacks!

Slime is a fun, sensory activity for kids, but it can become a nightmare for parents when it ends up stuck in the carpet. The gooey, sticky texture makes it difficult to remove, but don’t worry—getting slime out of your carpet is entirely possible with the right approach. This guide will walk you through effective and simple hacks to eliminate slime stains and restore your carpet’s cleanliness in no time.

Why Does Slime Stick to Carpet?

Slime is made from ingredients like glue, borax, or starch, which give it a sticky consistency that clings to carpet fibers. If left untreated, it can harden and become even more challenging to remove. Acting quickly and using the right techniques is key to minimizing damage and preventing permanent stains.

Tools and Materials You’ll Need

Before you start, gather these essential items:

  • Spoon or Butter Knife: To scrape off excess slime.
  • Vacuum Cleaner: For removing loose slime particles.
  • White Vinegar: A natural cleaning agent that breaks down slime residue.
  • Dish Soap: Helps loosen the slime for easy removal.
  • Rubbing Alcohol: Works well for dried or stubborn slime stains.
  • Warm Water: For rinsing and diluting cleaning solutions.
  • Clean Towels or Cloths: For blotting and drying.
  • Soft-Bristle Brush: To gently scrub the carpet.

Step-by-Step Guide to Removing Slime from Carpet

1. Act Quickly

  • The sooner you tackle the slime, the easier it is to remove. Don’t let it dry or harden on the carpet.

2. Scrape Off Excess Slime

  • Use a spoon or butter knife to gently scrape off as much slime as possible. Be careful not to push the slime deeper into the carpet fibers.

3. Vacuum Loose Particles

  • If there are any loose pieces of slime, vacuum the area to remove them. This step helps prevent the mess from spreading further.

4. Apply a Cleaning Solution

  • Mix one part white vinegar with two parts warm water in a spray bottle.
  • Spray the solution onto the slime stain, ensuring it’s damp but not overly saturated.
  • Let it sit for 5-10 minutes to break down the slime.

5. Blot and Lift

  • Use a clean cloth or towel to blot the area. Avoid rubbing, as this can spread the slime or push it deeper into the carpet.

6. Use Dish Soap for Stubborn Residue

  • Add a few drops of dish soap to warm water and apply it to the remaining slime residue.
  • Gently scrub the area with a soft-bristle brush to lift the slime.

7. Rinse with Warm Water

  • Dampen a clean cloth with warm water and blot the area to remove any cleaning solution or slime residue.
  • Continue blotting until the carpet feels clean.

8. Dry the Carpet

  • Use dry towels to absorb excess moisture. Press down firmly to extract as much water as possible.
  • Open windows or use fans to speed up the drying process.

Removing Dried Slime from Carpet

If the slime has already dried, follow these additional steps:

  1. Rehydrate the Slime
    • Spray the dried slime with warm water or vinegar solution to soften it.
    • Let it sit for a few minutes before scraping and cleaning.
  2. Apply Rubbing Alcohol
    • Dab rubbing alcohol onto a cloth and gently rub it over the dried slime. This helps dissolve the slime without damaging the carpet.
  3. Repeat Cleaning Steps
    • Use the vinegar or dish soap solution to clean the area and follow the blotting and drying process.

Pro Tips for Effective Slime Removal

  • Test First: Always test cleaning solutions on a small, inconspicuous area of the carpet to ensure they won’t cause discoloration.
  • Avoid Heat: Don’t use hot water, as it can set the stain and make it harder to remove.
  • Be Patient: Slime removal may take several rounds of cleaning, so don’t rush the process.

When to Call Professionals

If the slime stain persists or you’re dealing with an expensive or delicate carpet, it’s best to call in the experts. Hiring Emergency Carpet Cleaning Near Me ensures the stain is handled with professional-grade equipment and expertise, saving your carpet from permanent damage.

Tips to Prevent Future Slime Mishaps

  • Set Boundaries: Restrict slime play to areas without carpets, like the kitchen or playroom.
  • Use Mats: Place a washable mat or rug under slime play areas to protect your carpet.
  • Supervise Playtime: Keep an eye on kids during slime activities to prevent accidents.

Conclusion

Slime stains on your carpet don’t have to be a permanent problem. By following these quick and easy hacks, you can remove slime effectively and keep your carpet looking spotless. For tough stains or delicate carpets, consider reaching out to professional carpet cleaning services to ensure a thorough and safe cleaning process. With these tips, you can enjoy a slime-free, clean home without the stress.

Outdoor cushions add comfort and style to your patio furniture, but exposure to dirt, weather, and spills can leave them looking worse for wear. Regular cleaning not only keeps them looking fresh but also extends their lifespan. In this guide, we’ll show you how to clean your outdoor cushions effectively, using practical couch cleaning techniques to make the process easy and efficient.

Steps to Clean Outdoor Cushions Like a Pro

1. Check the Care Label

Before you begin, check the care label on your outdoor cushions. This will provide specific instructions for cleaning and let you know whether the covers are machine-washable or require hand washing.

2. Shake Off Loose Dirt

Start by removing the cushions from the furniture and shaking off loose dirt, dust, and debris. Use a soft brush to remove any embedded particles. This step makes the cleaning process easier and more effective.

3. Vacuum the Cushions

Use a vacuum cleaner with an upholstery attachment to clean the surface of the cushions thoroughly. Focus on seams and crevices where dirt tends to accumulate.

4. Prepare a Cleaning Solution

For effective cleaning, you can prepare a simple yet powerful solution:

  • Mix 1 tablespoon of dish soap with 1 gallon of warm water.
  • Add 1/4 cup of white vinegar for extra stain-fighting power.

5. Spot Clean Stains

For visible stains, use a clean cloth or sponge dipped in the cleaning solution to blot the affected areas. Avoid scrubbing too hard, as this can damage the fabric.

6. Wash the Cushions

  • For Removable Covers: If the cushion covers are removable and machine-washable, follow the instructions on the care label. Use a gentle cycle with cold water and mild detergent.
  • For Non-Removable Covers: Use a soft brush or sponge to scrub the entire cushion with the cleaning solution. Rinse thoroughly with a hose or damp cloth.

7. Dry the Cushions Completely

Proper drying is essential to prevent mold and mildew growth:

  • Place the cushions in a well-ventilated area to air dry.
  • Avoid direct sunlight for prolonged periods, as it can cause fading.
  • Stand the cushions upright to allow water to drain out completely.

Tips for Maintaining Outdoor Cushions

  • Use Protective Covers: Invest in waterproof covers to protect your cushions from the elements.
  • Store Cushions During Off-Seasons: Keep them in a dry, indoor space when not in use for long periods.
  • Regular Cleaning: Schedule routine cleaning as part of your overall couch cleaning efforts to keep your outdoor furniture looking its best.

Contact Us

Are your outdoor cushions looking dirty or worn out? Let us handle the mess! Our professional couch cleaning and outdoor furniture care services are here to help. With expertise in Stain Removal for Sofas and Couches in Ipswich and Sofa Sanitizing and Disinfecting Services Near Me, we’ll restore your cushions to their original beauty.

Phone: 0748029333
Email: info@carpetcleaning4u.com.au

Frequently Asked Questions (FAQs)

1. Can I use bleach to clean outdoor cushions?

It’s best to avoid bleach, as it can weaken the fabric and cause discoloration. Use a vinegar-based cleaning solution instead.

2. How do I remove mold or mildew from outdoor cushions?

Create a mixture of 1 cup white vinegar and 1 gallon of water. Apply it to the affected areas, scrub gently, and rinse thoroughly.

3. What if my outdoor cushions have a lingering odor?

Sprinkle baking soda on the cushions, let it sit for 30 minutes, and vacuum it off. This helps absorb odors.

4. When should I replace outdoor cushions?

If the fabric is torn, the foam is deteriorating, or stains won’t come out after cleaning, it might be time to replace the cushions.

Velvet curtains are the epitome of luxury, adding texture, warmth, and sophistication to any room. However, their plush and delicate fabric requires special care to maintain their charm and durability. Unlike other types of curtains, velvet demands gentle handling to avoid damage and retain its rich appearance.

Why Proper Care Is Essential for Velvet Curtains

Velvet’s dense pile gives it a soft, luxurious feel, but this also makes it prone to trapping dust, dirt, and pet hair. Improper cleaning can damage the fabric’s fibers, leading to flattening or discoloration. Regular cleaning not only preserves the beauty of your curtains but also extends their lifespan.

How Often Should You Clean Velvet Curtains?

The cleaning frequency depends on factors like location, exposure to dust, and the presence of allergens:

  • Weekly: Dust and vacuum to prevent buildup.
  • Seasonally: Deep clean your curtains every 3–6 months to remove embedded dirt and odors.
  • As Needed: Spot clean spills or stains promptly to prevent permanent damage.

Step-by-Step Guide to Cleaning Velvet Curtains

1. Dust and Vacuum Regularly

Regular dusting is crucial to maintain the freshness of velvet curtains and prevent dirt from settling into the fabric.

  • How to Do It:
    1. Close the curtains fully to create a flat surface.
    2. Use a vacuum cleaner with a soft brush attachment to gently remove dust and debris.
    3. Run the vacuum along the length of the curtains, paying extra attention to the folds.
  • Pro Tip: Vacuum both sides of the curtains for a thorough clean.

2. Spot Clean Stains Promptly

Accidental spills or stains can detract from the beauty of velvet curtains. Addressing these quickly minimizes the risk of permanent damage.

  • How to Spot Clean Velvet:
    1. Blot the stain gently with a clean, dry cloth to absorb excess liquid.
    2. Mix a small amount of mild detergent with lukewarm water.
    3. Dip a soft sponge or cloth into the solution, wring it out, and gently dab the stained area.
    4. Rinse with a damp cloth to remove soap residue and let the area air dry.
  • Pro Tip: Never rub the fabric, as this can flatten the pile and damage the velvet’s texture.

3. Steam Clean for a Deep Refresh

Steam cleaning is one of the safest and most effective methods for deep cleaning velvet curtains. It removes dirt, kills bacteria, and revives the fabric’s lush texture.

  • How to Steam Clean Velvet Curtains:
    1. Use a handheld steam cleaner or hire professional services for curtain steam cleaning near me to ensure a safe and thorough job.
    2. Hold the steamer a few inches away from the fabric and move it in gentle, vertical strokes.
    3. Allow the curtains to air dry completely after steaming.
  • Why It Works: Steam cleaning not only cleans the fabric but also restores its softness and removes wrinkles.

4. Dry Cleaning for Delicate Velvet

Some velvet curtains, especially those labeled “dry clean only,” require professional cleaning to avoid damage.

  • How to Do It:
    • Take your curtains to a trusted dry cleaner that specializes in delicate fabrics.
    • Communicate any specific stains or concerns to ensure the best results.
  • Pro Tip: Always check the care label before attempting to clean velvet curtains at home.

Preventative Tips to Maintain Velvet Curtains

  1. Use Curtain Liners:
    • Liners protect the fabric from direct sunlight, reducing fading and wear.
  2. Control Humidity:
    • High humidity can cause mildew on velvet. Use a dehumidifier to maintain a balanced indoor environment.
  3. Rotate and Adjust:
    • Shift the position of your curtains occasionally to ensure even exposure to sunlight.
  4. Handle with Care:
    • Avoid excessive pulling or tugging when opening and closing the curtains to prevent stress on the fabric.

Why Professional Curtain Cleaning Is Worth It

For heavily soiled or delicate velvet curtains, professional Curtain Cleaning services offer unparalleled expertise and care. Professionals use advanced tools and techniques to clean and rejuvenate your curtains without risking damage. Whether you need regular maintenance or stain removal, their specialized methods ensure your velvet curtains remain in pristine condition.

Benefits of Clean Velvet Curtains

  1. Enhanced Appearance: Regular cleaning restores the rich, luxurious texture of velvet.
  2. Improved Air Quality: Dust and allergens trapped in the fabric are removed, promoting a healthier home environment.
  3. Extended Lifespan: Proper maintenance prevents wear and tear, ensuring your curtains last longer.
  4. Luxurious Comfort: Clean curtains add a sense of opulence and refinement to your living space.

Conclusion

Velvet curtains are a beautiful and luxurious investment, but they require proper care to maintain their elegance. By incorporating regular dusting, spot cleaning, and occasional steam cleaning, you can keep your curtains looking fresh and stunning. For delicate fabrics or extensive cleaning, professional Curtain Cleaning services are the ideal solution.

Follow these expert tips, and your velvet curtains will continue to elevate your home’s style and comfort for years to come.

Plumbing failures can strike at any time, leaving behind extensive water damage that disrupts your life and drains your wallet. From burst pipes to leaking faucets, addressing these issues promptly is critical to protecting your home. In this article, we’ll cover practical prevention tips and effective repair strategies to minimize the risk of plumbing-related water damage. For severe cases, professional Water Damage Restoration services can ensure your property is fully restored.

Why Plumbing Failures Lead to Water Damage

Plumbing systems are the backbone of any home, providing water for daily activities. However, wear and tear, poor installation, or sudden pressure changes can lead to failures, causing leaks, bursts, and significant water damage. If left unchecked, water damage from plumbing issues can lead to:

  • Mold and mildew growth.
  • Weakening of walls and floors.
  • Electrical hazards.
  • Expensive repairs and restorations.

Tips to Prevent Water Damage from Plumbing Failures

1. Regular Inspections

Inspect your plumbing system regularly to spot potential issues before they escalate. Check for:

  • Leaks under sinks and around faucets.
  • Signs of corrosion on pipes.
  • Low water pressure, which could indicate a hidden leak.

2. Maintain Water Pressure

High water pressure can strain pipes, leading to bursts or leaks. Use a pressure gauge to ensure your water pressure remains below 60 PSI. If it’s too high, install a pressure-reducing valve.

3. Insulate Pipes

Cold weather can cause pipes to freeze and burst. Insulate exposed pipes in unheated areas, such as basements, crawl spaces, and garages, to prevent freezing.

4. Know Your Water Main

Locate your home’s main water shut-off valve. In the event of a major leak, turning off the water supply quickly can prevent extensive damage.

5. Install Leak Detectors

Smart leak detectors can alert you to leaks or unusual water usage, helping you catch problems early and minimize damage.

6. Avoid Clogs

Clogged drains and toilets can cause backups that lead to water damage. Prevent clogs by:

  • Avoiding pouring grease down the drain.
  • Using drain strainers to catch debris.
  • Being mindful of what you flush.

7. Schedule Professional Maintenance

Have a professional plumber inspect your system annually. They can detect hidden issues and perform preventative maintenance.

How to Repair Water Damage from Plumbing Failures

1. Turn Off the Water Supply

If a pipe bursts or a leak occurs, shut off the water supply immediately to prevent further damage.

2. Dry the Area Quickly

Use towels, fans, and dehumidifiers to dry the affected area. Quick action reduces the risk of mold growth and secondary damage.

3. Inspect for Hidden Damage

Water can seep into walls, floors, and ceilings. Use a moisture meter or consult a Water Damage Restoration professional to identify hidden damage.

4. Repair or Replace Damaged Pipes

For minor leaks, patching or sealing the pipe may suffice. However, severely damaged pipes often need to be replaced.

5. Restore Damaged Surfaces

If water damage affects drywall, flooring, or insulation, replace these materials to prevent mold growth and restore the structural integrity of your home.

When to Call a Professional

In cases of extensive water damage, professional Restoration services are essential. Professionals can:

  • Extract Water: Quickly remove standing water from your home.
  • Dry and Dehumidify: Use advanced equipment to ensure all moisture is eliminated.
  • Sanitize: Disinfect affected areas to prevent mold and bacteria growth.
  • Repair and Restore: Restore your home to its original condition, ensuring no lingering damage.

Contact Us

If your home has suffered water damage from a plumbing failure, don’t wait to take action. Our experienced team specializes in Water Damage Restoration Near Me to ensure your property is restored quickly and safely. Contact us today for a consultation and let us help you protect your home from further damage.

Conclusion

Plumbing failures can cause serious water damage if not addressed promptly. By following preventative measures like regular inspections, maintaining water pressure, and insulating pipes, you can reduce the risk. And when plumbing disasters strike, professional Water Damage Restoration ensures your home is restored efficiently and effectively. Protect your home today by staying vigilant and taking quick action when problems arise.

FAQs About Water Damage from Plumbing Failures

Q1: How can I detect a hidden plumbing leak?

Look for signs like water stains, unexplained high water bills, and musty odors. A professional plumber can also use specialized tools to locate leaks.

Q2: Is water damage covered by insurance?

Most homeowner’s insurance policies cover sudden and accidental water damage, such as from burst pipes. However, damage from neglect may not be covered.

Q3: Can I repair water damage myself?

Minor damage can be handled with DIY methods, but extensive water damage requires professional Damage Restoration to ensure thorough cleanup and repair.

Q4: How do I prevent pipes from bursting in winter?

Insulate exposed pipes, let faucets drip during freezing temperatures, and maintain a consistent indoor temperature.

Q5: How quickly should I act after discovering water damage?

Immediate action is crucial. The sooner you address water damage, the less severe the consequences will be.

Mould on a mattress is more than just unsightly—it’s a serious hygiene issue. Caused by excess moisture and poor ventilation, mould can lead to unpleasant odors, health problems, and a compromised sleep environment. If left untreated, it can even damage your mattress permanently. But don’t worry! With the right techniques and a bit of effort, you can remove mould and restore your mattress to a clean and healthy state.

This guide provides actionable steps to tackle mould effectively while emphasizing the importance of regular mattress cleaning to maintain a hygienic sleep space.

Why Does Mould Form on a Mattress?

Understanding why mould develops can help prevent it in the future. Common causes include:

  • Excess moisture: Spills, sweat, and humidity create a breeding ground for mould.
  • Poor ventilation: Limited airflow prevents moisture from evaporating, allowing mould to thrive.
  • Infrequent cleaning: Dirt, dust, and moisture buildup contribute to mould growth.

How to Identify Mould on Your Mattress

Mould on a mattress can appear as:

  • Black, green, or white spots.
  • A musty or damp smell.
  • Discolored or stained areas.

If you notice any of these signs, it’s time to take action immediately.

Step-by-Step Guide to Remove Mould from Your Mattress

1. Take the Mattress Outdoors

  • Move the mattress to a sunny, well-ventilated area.
  • Sunlight helps kill mould spores, and fresh air aids in drying out the mattress.
  • Avoid cleaning the mattress indoors to prevent mould spores from spreading.

2. Vacuum the Mattress

  • Use a vacuum cleaner with an upholstery attachment to remove loose mould spores, dust, and debris.
  • Focus on seams, crevices, and corners where mould may be hidden.
  • Dispose of the vacuum bag or empty the canister immediately after use to prevent spore spread.

3. Create a Cleaning Solution

  • Mix equal parts white vinegar and water in a spray bottle. Vinegar is a natural antifungal and disinfectant.
  • For stubborn mould, you can add a few drops of tea tree oil to the solution for extra effectiveness.

4. Apply the Solution

  • Spray the vinegar solution onto the mould-affected areas. Ensure the mattress is damp but not soaked.
  • Allow the solution to sit for 10–15 minutes to kill the mould and loosen the stains.

5. Scrub the Stains

  • Use a soft-bristled brush or sponge to scrub the affected areas gently.
  • Focus on discolored spots, but avoid applying too much pressure to prevent damage to the mattress fabric.

6. Rinse with a Damp Cloth

  • Dampen a clean cloth with water and blot the cleaned areas to remove any residue.
  • Avoid oversaturating the mattress, as excess moisture can lead to further mould growth.

7. Dry Thoroughly

  • Leave the mattress in direct sunlight for several hours to dry completely.
  • Use fans or a dehumidifier indoors if outdoor drying is not possible.
  • Ensure the mattress is entirely dry before bringing it back inside or using it.

8. Deodorize with Baking Soda

  • Sprinkle baking soda over the mattress surface to absorb any lingering odors and moisture.
  • Let it sit for a few hours or overnight before vacuuming it off.

Preventing Mould on Your Mattress

Prevention is key to avoiding future mould problems. Here are some tips:

  • Use a mattress protector: Waterproof protectors shield your mattress from spills and sweat.
  • Keep your bedroom ventilated: Open windows or use fans to improve airflow.
  • Control humidity levels: Use a dehumidifier in humid climates to reduce moisture.
  • Wash bedding regularly: Clean sheets, pillowcases, and mattress toppers to minimize dirt and moisture buildup.
  • Flip and rotate your mattress: Regularly flipping and rotating your mattress helps distribute wear and prevents mould from forming in hidden areas.

When to Call Professionals

If the mould persists despite your efforts or covers a large area, it’s best to consult Professional Stain Removal for Mattresses. Professionals use specialized equipment and cleaning solutions to remove mould effectively without damaging your mattress, ensuring a safe and hygienic sleeping environment.

Why Regular Mattress Cleaning Is Crucial

In addition to tackling mould, regular mattress cleaning offers several benefits:

  • Removes allergens, dust mites, and bacteria.
  • Maintains the freshness and longevity of your mattress.
  • Creates a healthier and more comfortable sleeping environment.

Conclusion

Mould on a mattress can be alarming, but with quick action and the right techniques, it’s possible to restore your mattress to a clean and fresh state. Regular mattress cleaning and preventive measures like using a mattress protector and controlling humidity levels will help keep your mattress mould-free for years to come. For severe cases or deep cleaning needs, don’t hesitate to call on Professional Stain Removal for Mattresses for expert assistance.

Area rugs are more than just decorative pieces—they add warmth, comfort, and style to your living space. However, rugs can also accumulate dirt, allergens, and stains over time, diminishing their appearance and potentially impacting your home’s cleanliness. Knowing how to clean your area rug the right way is essential for maintaining its beauty and extending its lifespan.

This step-by-step guide will teach you professional-grade tips and tricks for cleaning your area rug effectively, while also keeping it safe from damage.

1. Start with a Good Vacuuming

Vacuuming is the first step in any rug cleaning process. It removes surface dirt, dust, and debris that can otherwise settle deep into the fibers.

How to Vacuum Your Area Rug:

  • Use a vacuum with adjustable suction settings to avoid damaging the fibers.
  • Vacuum both sides of the rug, as dirt can accumulate underneath.
  • Pay extra attention to high-traffic areas where dirt tends to build up.

Pro Tip: Vacuum weekly to prevent dirt from embedding into the rug’s fibers, making cleaning easier in the long run.

2. Shake Out Smaller Rugs

For lightweight rugs, shaking them outside is an effective way to dislodge loose dirt and debris.

Steps to Shake Out Your Rug:

  • Take the rug outside to an open area.
  • Hold it firmly and give it a good shake.
  • Beat the back of the rug with a broom or rug beater to loosen deeply embedded dirt.

Pro Tip: Choose a dry, sunny day to shake out your rug, allowing it to air out naturally.

3. Spot Clean Spills and Stains Immediately

Accidents happen, and acting quickly can prevent spills from becoming permanent stains.

How to Spot Clean an Area Rug:

  1. Blot, Don’t Rub: Use a clean cloth or paper towel to blot the spill gently. Avoid rubbing, as this can spread the stain or push it deeper into the fibers.
  2. Apply a Mild Cleaning Solution: Mix a few drops of dish soap with warm water. Test the solution on a small, hidden area of the rug to ensure it won’t cause discoloration.
  3. Blot and Rinse: Blot the stained area with the cleaning solution, then rinse with a damp cloth. Repeat as needed until the stain is gone.

Pro Tip: For stubborn stains, search for professional same day rug cleaning services to ensure expert removal.

4. Deep Clean Your Rug Annually

In addition to regular vacuuming and spot cleaning, your rug needs a deep clean once or twice a year to remove embedded dirt and restore its freshness.

Steps for Deep Cleaning an Area Rug:

  1. Check the Care Label: Before starting, check your rug’s care label for specific cleaning instructions. Some rugs require dry cleaning or professional care.
  2. Use a Rug Shampoo: Purchase a rug shampoo suitable for your rug’s material, or make a DIY cleaning solution using dish soap and water.
  3. Scrub Gently: Use a soft-bristle brush to apply the shampoo in circular motions, working it into the fibers.
  4. Rinse Thoroughly: Rinse the rug with clean water to remove all soap residue.
  5. Dry Completely: Lay the rug flat to air dry, ensuring it’s completely dry before placing it back on the floor.

Pro Tip: Avoid over-saturating your rug, as excess water can weaken the fibers or cause mold and mildew.

5. Use Baking Soda for Deodorizing

Baking soda is a natural and effective way to remove odors from your area rug.

How to Deodorize Your Rug:

  • Sprinkle baking soda generously over the rug’s surface.
  • Let it sit for at least 30 minutes, or overnight for strong odors.
  • Vacuum thoroughly to remove the baking soda.

Pro Tip: Regular deodorizing keeps your rug smelling fresh and eliminates pet odors or mustiness.

6. Protect Your Rug with a Rug Pad

A rug pad does more than prevent slipping—it also reduces wear and tear, protects your flooring, and makes cleaning easier by keeping dirt from accumulating underneath.

Benefits of a Rug Pad:

  • Adds cushioning for a more comfortable feel.
  • Prevents rug edges from curling or bunching.
  • Prolongs the life of both your rug and the flooring beneath it.

7. Rotate Your Rug Regularly

Rotating your rug every few months ensures even wear and prevents fading in areas exposed to direct sunlight.

How to Rotate Your Rug:

  • Mark a reminder on your calendar to rotate your rug 180 degrees every three to six months.

Pro Tip: For rugs in high-traffic areas, rotate them more frequently to distribute wear evenly.

8. Seek Professional Help for Delicate Rugs

Delicate rugs, such as Oriental, silk, or antique rugs, require specialized care to avoid damage. Attempting DIY cleaning on these rugs can result in fading, shrinking, or fraying.

Why Choose Professional Cleaning:

  • Professionals use gentle, material-specific methods to clean delicate rugs safely.
  • They ensure proper drying to prevent mold and mildew.

Pro Tip: For expert care, search for rug cleaning services that specialize in delicate and antique rugs.

Conclusion

Cleaning your area rug the right way doesn’t have to be overwhelming. By incorporating regular maintenance, such as vacuuming and spot cleaning, and scheduling deep cleaning annually, you can keep your rug looking vibrant and fresh. Don’t forget the importance of using a rug pad and rotating your rug to ensure even wear and longer-lasting beauty.

For delicate rugs or challenging stains, it’s best to trust professional rug cleaning services. Whether you need a routine clean or emergency care, keeping your rug in top condition is an investment in your home’s comfort and style.

Carpet patching is a cost-effective way to fix damaged areas of your carpet without replacing the entire flooring. Whether it’s a burn, tear, or stubborn stain, patching restores the look of your carpet while saving you money. But how much does carpet patching cost? Several factors determine the price, including the size of the patch, labor charges, and material quality. Here’s what you need to know about carpet patching costs and how to save on repairs.

Factors That Affect Carpet Patching Costs

The cost of carpet patching depends on various factors, such as:

  • Size of the Damaged Area – Larger patches require more materials and labor, increasing the overall cost.
  • Type of Carpet – Wool, nylon, and polyester carpets have different pricing for patching, with high-end materials costing more.
  • Extent of Damage – Minor damage may be easy to fix, while severe issues may require additional work, increasing the price.
  • Labor Charges – Professional repair services charge based on experience and complexity of the job.
  • Availability of Matching Carpet – If an exact match is unavailable, additional work may be needed to blend the patch with the existing carpet.

Average Cost of Carpet Patching

Carpet patching costs can vary based on location and the factors mentioned above. Here’s a general estimate:

  1. Small Repairs (Less than 1 Square Foot) – $50 to $100
  2. Medium-Sized Patches (1 to 3 Square Feet) – $100 to $200
  3. Large Patches (More than 3 Square Feet) – $200 to $350
  4. Complex Repairs (Pattern Matching, Seam Fixing) – $300 to $500

Labor costs range from $50 to $100 per hour, depending on the expertise of the repair specialist. If extra services like carpet cleaning are required, they may be charged separately.

How to Save on Carpet Patching Costs

To minimize costs while ensuring a high-quality repair, consider these money-saving tips:

  • Use Leftover Carpet Scraps – If you have leftover carpet from the original installation, it can be used for patching, saving on material costs.
  • Check Under Furniture or Closets – If an extra piece isn’t available, carpet from a hidden area can be used for a seamless match.
  • Compare Quotes – Get estimates from multiple professionals to find a service that fits your budget.
  • Bundle Services – Some companies offer discounts when combining patching with other services like stretching or carpet cleaning.
  • DIY Patch Repair – If the damage is small and you’re comfortable with DIY repairs, patching the carpet yourself can save labor costs.

DIY vs. Professional Carpet Patching

If you’re considering DIY carpet patching, you’ll need a carpet knife, adhesive, and a matching patch. While this method can work for small repairs, professional services ensure a seamless fix with long-lasting results. Experts like Carpet Repair Experts in Ipswich have the right tools and experience to handle complex patches and ensure a perfect match.

When to Replace Instead of Patch

Carpet patching is ideal for isolated damage, but in some cases, replacing the carpet might be a better investment. Consider replacement if:

  • The damage covers a large area beyond repair.
  • The carpet is old and worn out in multiple places.
  • There’s mold or extensive water damage.

A professional assessment can help determine whether patching or replacing is the best option.

Conclusion

Carpet patching is an affordable way to fix damaged sections without replacing the entire carpet. Costs vary based on the size of the patch, labor, and materials, but with the right approach, you can save money while maintaining the look of your flooring. Whether you opt for DIY or professional services, patching helps extend the life of your carpet and keeps your home looking great.

Pet accidents are part of life when you have furry companions. While we love our pets, dealing with the stains and odors they leave behind can be a challenge. Thankfully, with a few simple carpet cleaning techniques, you can restore your carpets and keep your home smelling fresh.

In this article, we’ll explore five effective methods to eliminate pet stains and odors, ensuring your carpets look and smell as good as new.

1. Act Quickly to Blot the Stain

Timing is everything when it comes to pet stains. The sooner you address the issue, the easier it will be to remove both the stain and the smell.

  • Use a clean cloth or paper towel to blot (not rub) the urine.
  • Press gently to absorb as much liquid as possible.
  • Avoid spreading the stain further by working from the outside in.

Pro Tip: A quick response not only simplifies carpet cleaning but also prevents the urine from seeping into the carpet padding.

2. Use a DIY Vinegar Solution

A simple homemade cleaning solution can work wonders on pet stains. Vinegar is excellent for neutralizing odors and breaking down stain particles.

Ingredients:

  • 1 cup of white vinegar
  • 1 cup of water
  • 2 tablespoons of baking soda (optional)

Instructions:

  1. Mix the vinegar and water in a spray bottle.
  2. Spray the solution generously onto the stained area.
  3. Let it sit for 10-15 minutes, then blot with a clean cloth.
  4. Sprinkle baking soda over the area to absorb odors and vacuum it up once dry.

This eco-friendly cleaning solution is safe for pets and effective for most carpet types.

3. Try an Enzymatic Cleaner

For tough stains and lingering odors, enzymatic cleaners are a game-changer. These cleaners contain natural enzymes that break down the proteins in pet urine.

  • Spray the enzymatic cleaner directly onto the stain.
  • Allow it to sit as instructed on the product label (usually 15-30 minutes).
  • Blot and rinse the area with water to remove residue.

Enzymatic cleaners are available at most pet supply stores and are specifically designed for pet-related messes.

4. Baking Soda and Hydrogen Peroxide Combo

For particularly stubborn stains, a combination of baking soda and hydrogen peroxide can be highly effective.

Steps:

  1. Sprinkle baking soda over the stain to absorb moisture and odors.
  2. Mix ½ cup of hydrogen peroxide with a teaspoon of dish soap.
  3. Pour the mixture over the baking soda and scrub gently with a brush.
  4. Blot the area with a clean cloth and allow it to dry.

This powerful method not only removes stains but also eliminates odors, making it an excellent choice for deep services.

5. Hire Professional Carpet Cleaning Services

If DIY methods don’t achieve the desired results, professional services can help. Experts use specialized equipment and cleaning solutions to tackle even the most stubborn pet stains and odors.

  • Professionals can clean deep into the carpet fibers and padding.
  • Many services offer pet-safe cleaning options.
  • Regular professional cleaning extends the life of your carpet.

Contacting a trusted services ensures your home stays fresh and hygienic, even with pets around.

Contact Us for Expert services

If pet stains and odors are taking a toll on your carpets, we’re here to help. Our professional carpet cleaning services are designed to tackle even the toughest messes, leaving your home fresh and spotless.

Find us by reliable carpet cleaners near me to book an appointment for and say goodbye to pet stains for good!

By following these simple steps and seeking professional help when needed, you can maintain clean, fresh carpets even with pets in the house. Your furry friends deserve a comfortable home—and so do you!

FAQs About Removing Pet Stains and Odors

Q1: Can pet urine stains permanently damage carpets?

Yes, if not treated promptly, urine can seep into the carpet padding and cause discoloration or lingering odors.

Q2: Are enzymatic cleaners safe for pets?

Absolutely. Enzymatic cleaners are designed to be pet-friendly while effectively breaking down urine stains.

Q3: How often should I deep clean my carpets with pets at home?

It’s recommended to deep clean your carpets every 6-12 months, depending on the level of pet activity.

Q4: Can vinegar damage carpets?

Vinegar is safe for most carpets, but it’s always a good idea to test a small area first to ensure no discoloration.

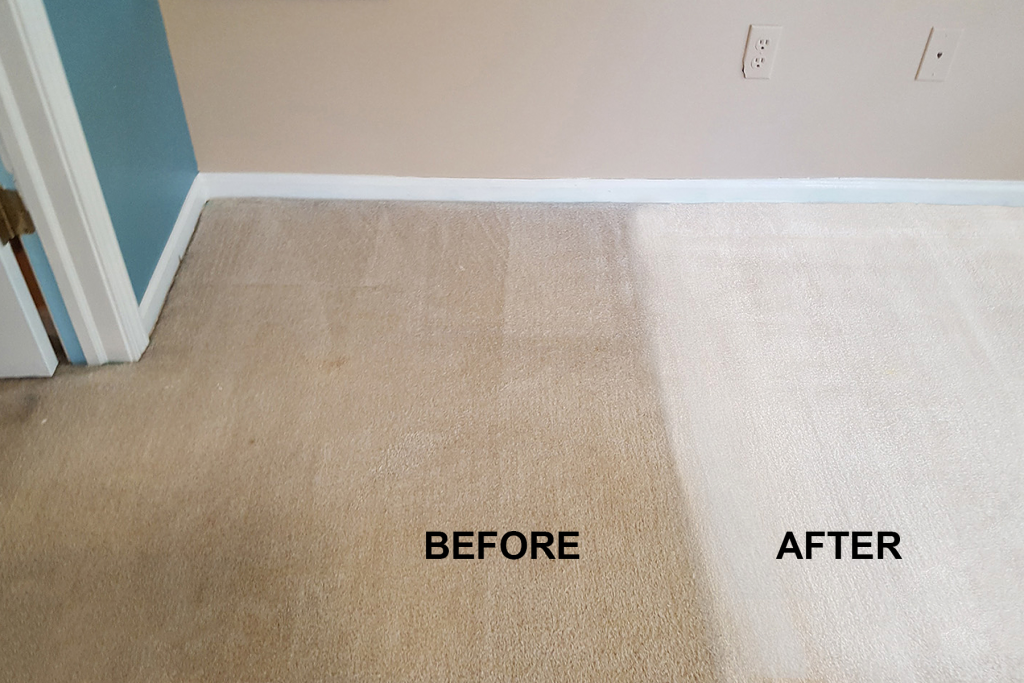
Water flooding inside our interiors can be a very problematic situation requiring swift action. Often water can damage your structure, furniture, upholstery and carpet. Water accumulation inside our homes can create many problems associated with our health, hygiene and infrastructure. Carpets are very prone to water damage and constant soaking of water in carpets can lead to the formation of mould or mildew and also harbour dangerous germs and bacteria. By taking care of sources of water flooding we can take care of our homes and carpets. Carpet water extraction is essential to be done on time so as to avoid permanent damage to the carpet and make sure that no mould is formed. After carpet water extraction we should always dry your carpets as soon as possible because further delay in drying can damage the fibres of your carpets and compromise the overall quality and life of your carpets. We are providing you with some sources and prevention of carpet water damage from flood water:

Prevent Your Carpet From Water Damage

Rain and Rainwater Management

Rainwater is the topmost natural source of water flooding inside our homes. Rainwater can seep inside through ceilings, walls, and windows. By making sure that your ceiling is water-resistant and has proper drainage for rainwater removal you can make sure that no rainwater leaks in. Plumbing pipes and your drainage system will help you get rid of rainwater but any blockage inside your pipes can result in overflow and flooding of rainwater inside. Commercial sealants should be used to seal any crack or leakage seen in the walls and pipes and by applying waterproof paints we can stop the penetration of water inside through the walls. Shut your windows and doors in the event of rainfall and properly check your interiors for any movement of rainwater.

Washing Machines and Dishwashers or Air Conditioners

Washing machines hold a lot of amount of water, so we should always check the inner apparatus and floor of the machine to make sure that there is no rust or damage to it. Any damage to the machinery can result in water flooding and sometimes it can lead to an accident. Machines should not be overfilled with water and make sure that the overfill hose is attached to it, so the water amount is under check. Never operate your dishwasher and washing machines in your absence. Air conditioners often result in water flooding too as the moisture inside builds up, it condenses and drips on your carpets through walls. Keep your air conditioner working in excellent condition and by regular service and usage, you can control any malfunctioning and water leaking of air conditioners. Dishwashers should be checked constantly, their pipes and floorings should be intact and no sign of leakage or damage should be seen. Fix any problem associated with your home appliances and prevent carpet water damage.

Gutter and Sewage

Gutters and sewages provide a pathway for dirty unhygienic water to run out of our homes. People often face serious problems in case of sewage and gutter blockage Clogged gutters will overflow and flood your house with dirty harmful water which your carpets will soak in. This will lead to a very bad stink and attack of very harmful pathogens and germs which will put your family at risk of illness. Hire professional Flood Damage Restoration Ipswich services for carpet water extraction. Professional carpet cleaners will also help you with carpet sanitization and carpet deodourisation.

Hire Carpet Cleaning 4U Services

Carpet Cleaning 4U is an age-old and experienced company providing professional cleaning services. We offer round-the-clock service and can fix and restore your carpets from Carpet Water Damage Flood Restoration. Appoint Our skilled team of experts will provide a solution to your carpet problems in no time.

For giving an incredible look to your home, one can use carpets of any fabric, color, and design. But, one of the main concerns of every homeowner is the cleaning of the carpets. When it comes to carpet cleaning, you should choose the Best Carpet cleaner services. But, how to find which carpet cleaner is the best one? To remove this doubt, you can follow these below mentioned top tips that help in knowing which cleaner can help you-

  1. Look at the cleaning experience of the cleaners

Before you hire Best Carpet cleaning services, you need to ensure that you’ve gathered all the crucial details about the carpet cleaner’s experience. Experience in the field of carpet cleaning matters the most. Do they have experienced cleaners? Do they know how to manage the carpet cleaning process? Are they having enough cleaning supplies and carpet cleaning equipment?  An experienced carpet cleaner knows how to remove dirt, dust, and stains with ease. So, check their years of experience by visiting their website and know more about the services that they offer. So, for cleaning different carpets, there’s a need for cleaners who have ample experience in carpet cleaning.

  1. Read each customer’s reviews and testimonials

When you’re about to make a selection of carpet cleaners, you need to know what others say about the services. Choosing the best cleaning services is not an easy task as there’s availability of several professional carpet cleaners. So, this creates a lot of confusion and makes it difficult for people to choose the right and best one. 

So, to know more about carpet cleaners, you can start checking the reviews and testimonials of the service provider. For this, you can go to the carpet cleaner’s website to read their testimonials and reviews. Reviews from previous customers are a lot helpful as you can know about the quality of service, type of cleaning equipment they have, pricing, and professionalism of the service provider. Before you finalize any carpet cleaner for your carpets, you should read their reviews first.

  1. Research about their market reputation

Want to hire the Best Carpet cleaner services? For this, you should start researching some top listed carpet cleaners. Therefore, it’s crucial to do market research about the carpet cleaners that are available in the market. Ask queries about the service to the carpet cleaners and get your queries to be solved. Along with this, go through online forums to find out more about the quality of cleaning service. If you are satisfied with their market reputation then you can choose them as your best carpet cleaner.

Conclusion

Today, the market is flooded with carpet cleaners and you will find various types of carpet cleaners. But, you don’t have to go with those who only claim to be the best.  You must follow these above-mentioned carpet cleaning tips to find out the best and most reliable carpet cleaner. So, this helps in finding trusted cleaners with ease. Therefore, book our best carpet cleaning services by calling us on 0488 851 508.